Fat Eighth Frenzy
|
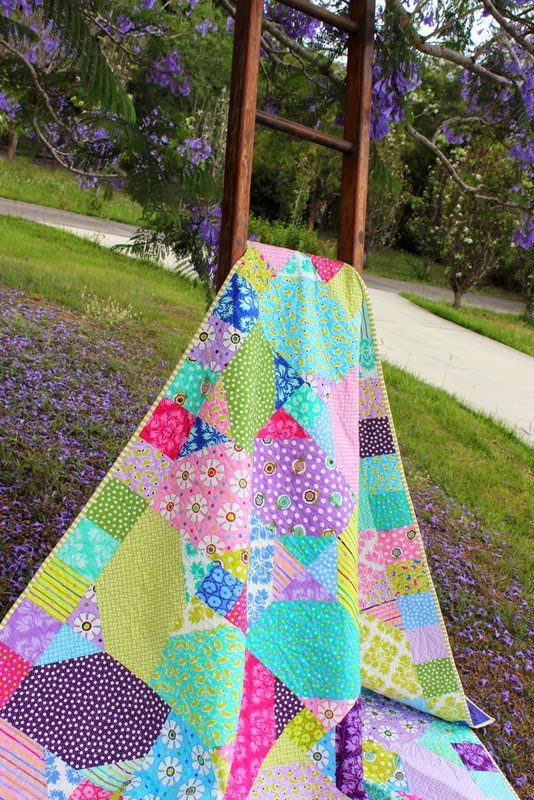
| My version – ‘Eight-Y’ |
Fat Quarter Shop has added to the Shortcut Quilt family with the Fat Eighth Frenzy pattern.
Here is the link to the FREE Fat Quarter Shop pattern:
Here is the link to the Fat Eighth Frenzy video:
And also the bonus quilt video:
If you’re unfamiliar with our Shortcut Quilt series, here are a couple of examples:
Jelly Roll Jam 2: http://youtu.be/sf98KddO1Uk
Jelly Roll Jam 2: http://youtu.be/sf98KddO1Uk
Fat Quarter Fizz: http://youtu.be/6bNFkjKJKrU
The FQS also offer a kit version.
Visit these bloggers to see what they have made from their F8th bundles.
Sherri of A Quilting Life
Andy of A Bright Corner
Alyce of Blossom Heart Blog
Connie of Free Motion by the Water
Melissa of Happy Quilting
Lindsay of The Cottage Mama
Karin of Leigh Laurel Studios
Lisa of Life Full of Laughter
Tricia of Notes of Sincerity
Jane of Quilt Jane
Heather of House of A La Mode
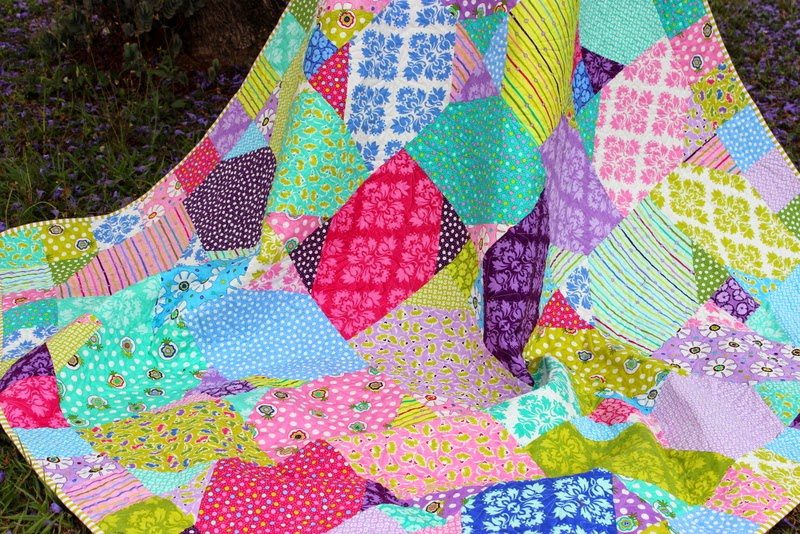
I chose to be adventurous and make my own pattern using every piece of my LOL F8 bundle by Me and My Sister Designs from Moda.
 |
| Finished Block Size : 20″ x 20″ Finished Quilt Size : 68 1/2″ x 68 1/2″ |
Requirements
- 1 – F8 Bundle (40 – 9″ x 22″ pieces)
- Binding : 3/4 yard (8 – 2 1/2″ x WOF)
- Backing : 4 1/2 yards
Step 1 – Cutting
- Select 36 – 9″ x 22″ pieces from the F8 Bundle.
- Cut into 1 – 9″ x 12″ and 1 – 9″ x 9″ piece.
- From the remaining 4 – 9″ x 22″ pieces, cut 9 – 3 1/2″ x 3 1/2″ squares.

- Cut the 9″ x 9″ squares into 4 – 4 1/2″ x 4 1/2″ squares.

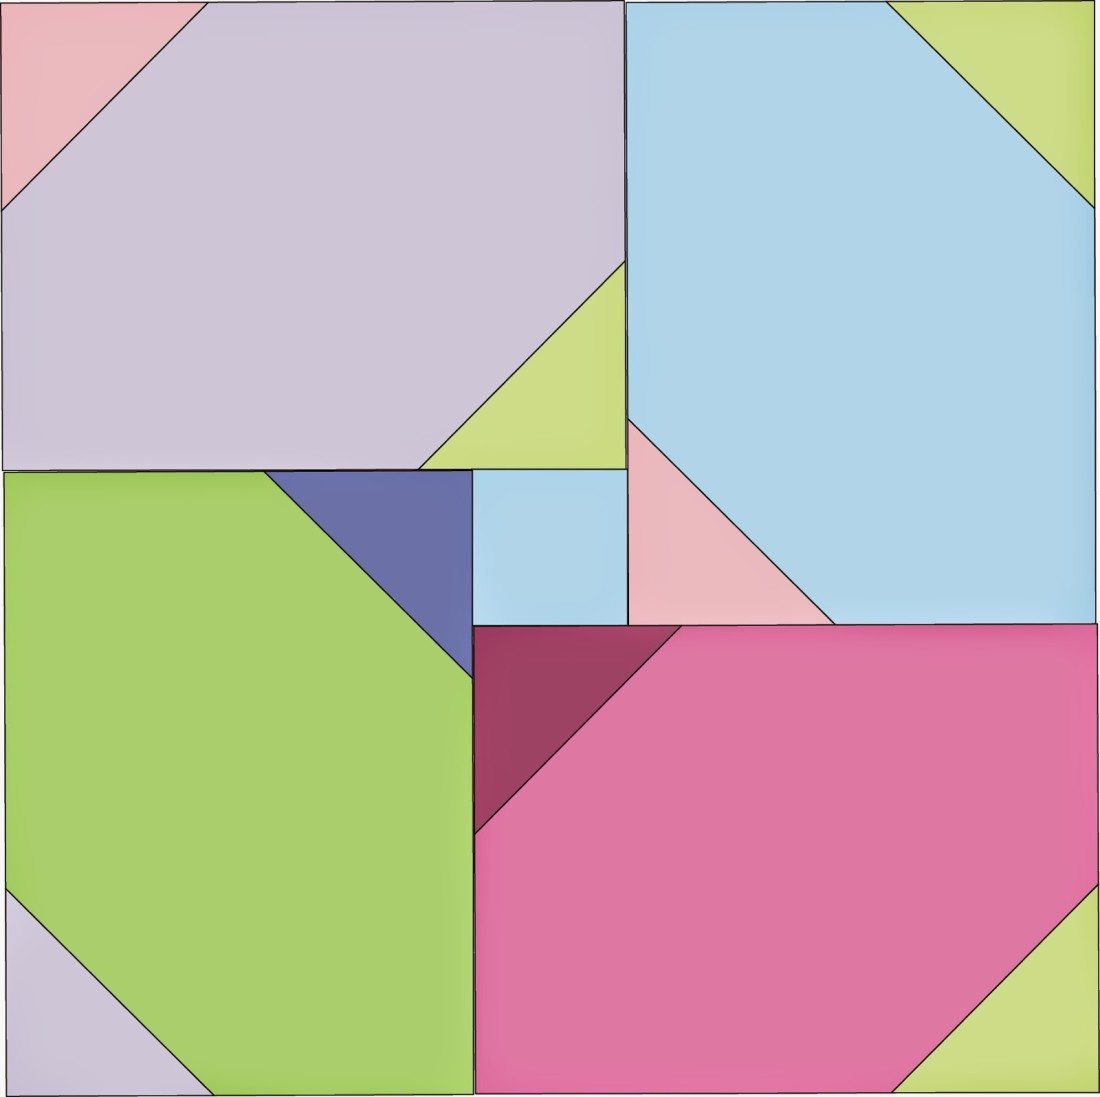
Step 2 – Block Assembly
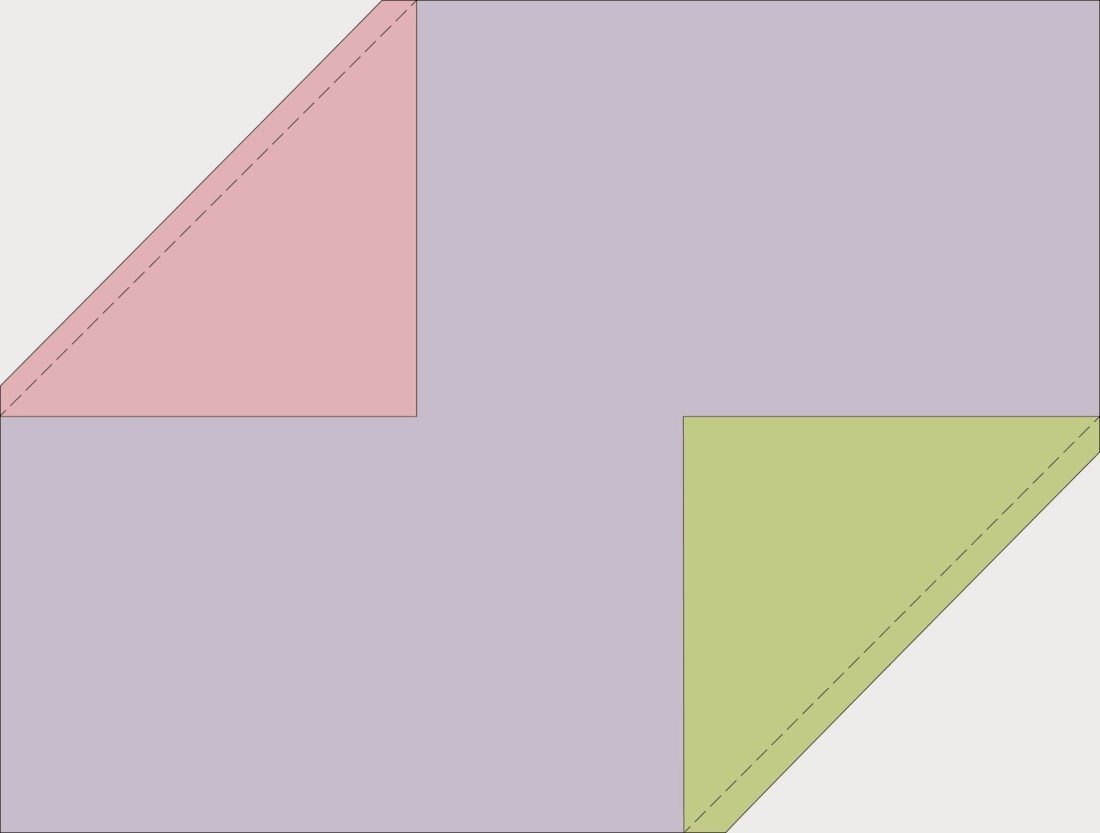
- Select 72 – 4 1/2″ x 4 1/2″ squares and draw a diagonal line on the wrong side.
- Place a 4 1/2″ x 4 1/2″ square on opposite corners of a 9″ x 12″ rectangle.
- Stitch a thread width on inside of the line.
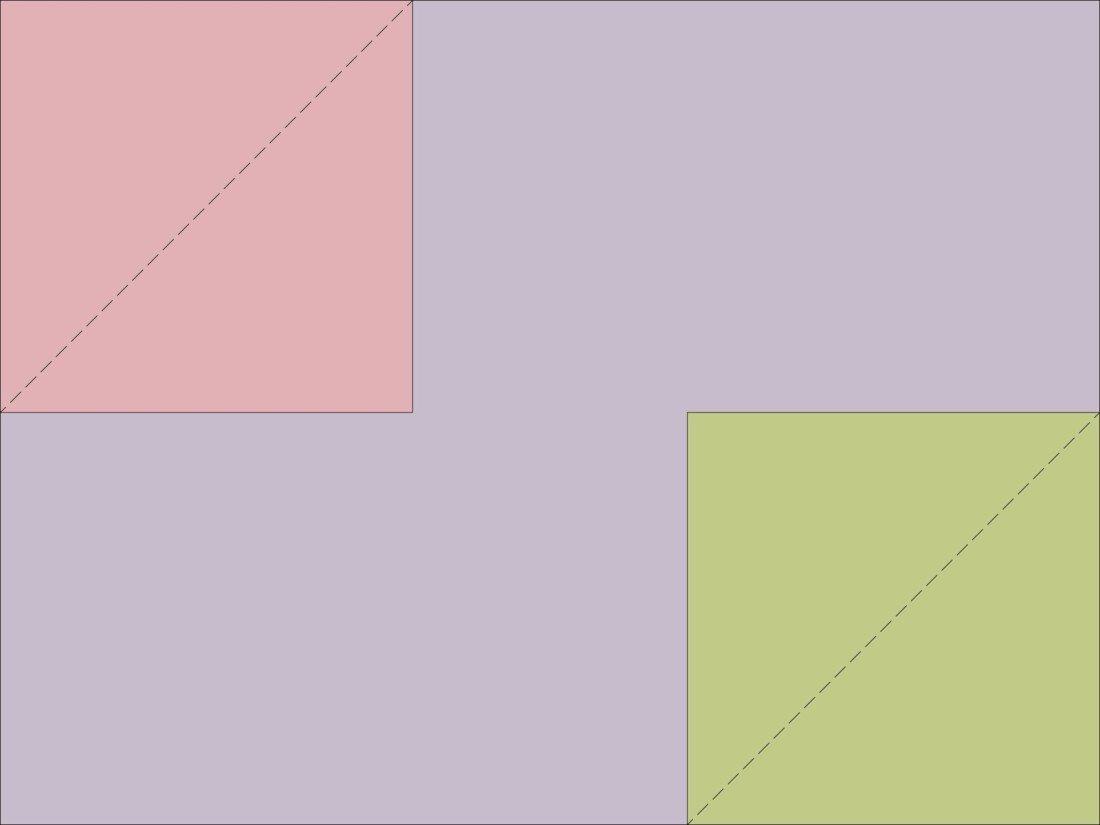
- Trim excess fabric leaving a 1/4″ seam allowance.
- Press open.

Step 3
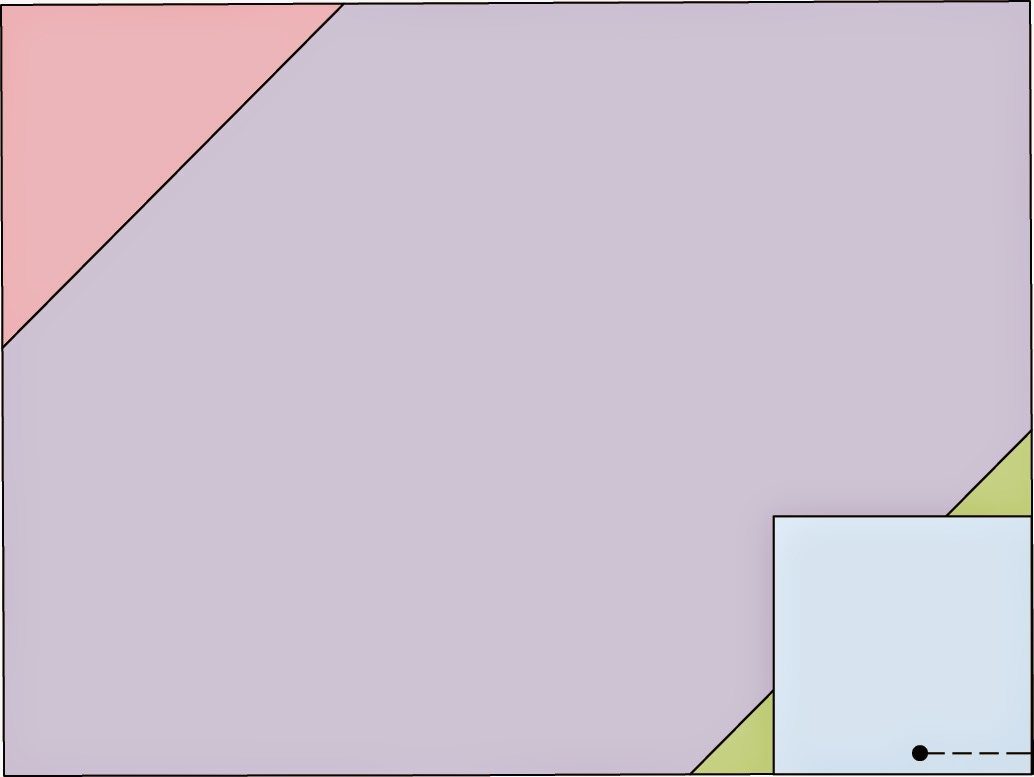
- Select a 3 1/2″ x 3 1/2″ square.
- Place on lower corner of block. Right sides together.
- Starting approximately 1 1/2″ in, stitch to end. (Partial Seam).
- Press towards the centre.
- Continue adding blocks around the centre square.
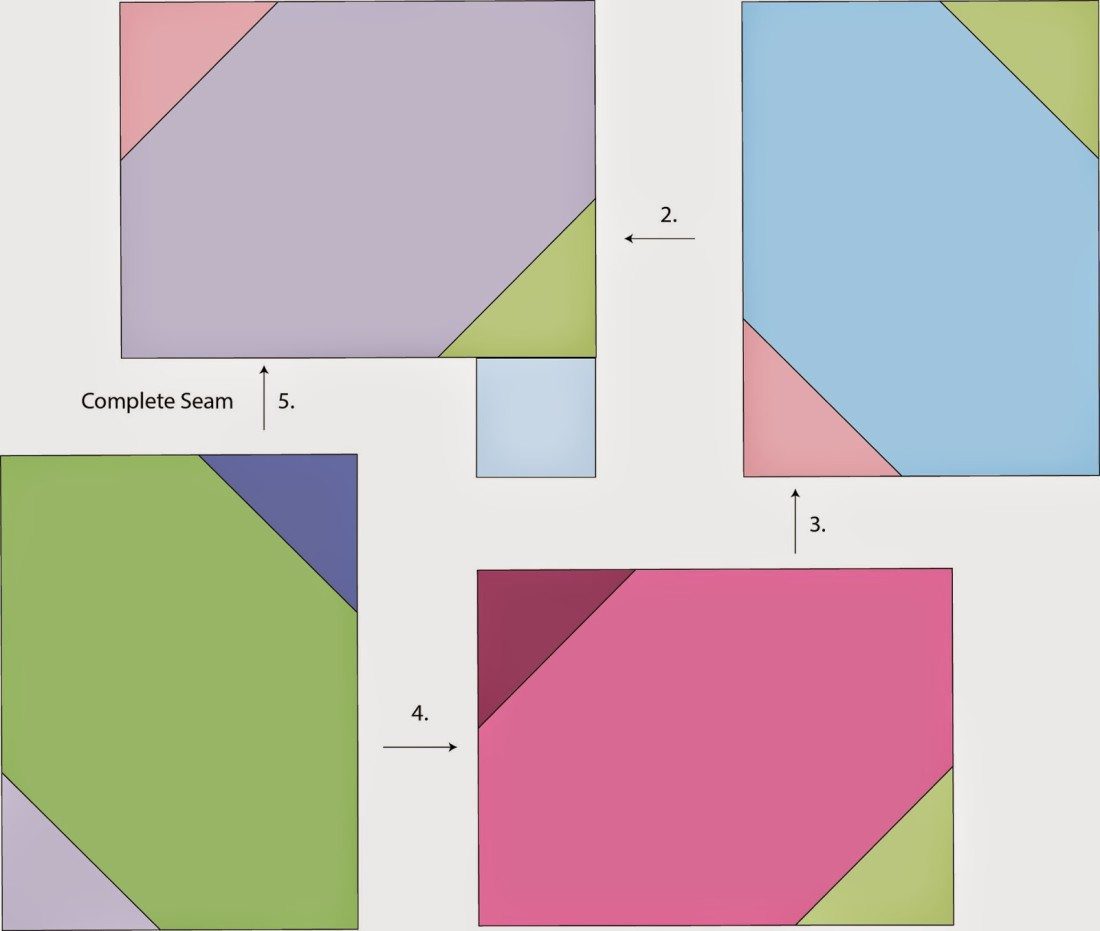
- Complete the last seam.
- Make 9 blocks
Step 4 – Assembly
- Sew 3 blocks together.
- Make 3 rows and sew together.
Step 5 – Scrappy Border
- Using the remaining 4 1/2″ x 4 1/2″ squares, sew 2 sets of 15 blocks for top and bottom border.
- Sew 2 sets of 17 blocks for side borders.
Note : In a perfect world, the measurement of the quilt centre will be 60 1/2″ x 60 1/2″ and the pieced borders should fit perfectly. Always measure top, middle and bottom of your quilt top and use the average of the 3 measurements. If you need to, adjust your pieced borders to fit this measurement.
Step 6 – Finish your quilt
- Layer, baste and quilt. I chose a modern daisy design in a thread that highlighted the aqua prints in the collection.
- Bind and label and give it to someone you love.
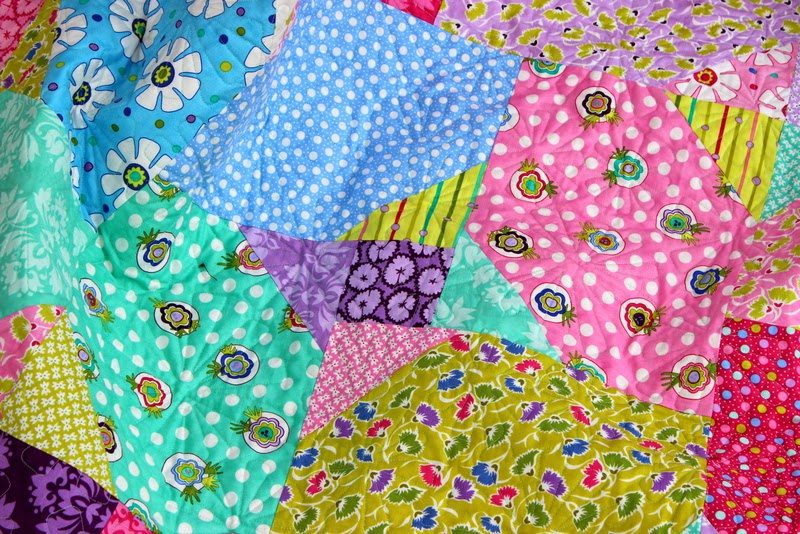
Quilted with a modern daisy pattern with Aurifil 50wt cotton # 2830 and backed in Bella Solid 9900-168 Terrain Iris. Finished with a binding of Michael Miller Clown Stripe.


You May Also Like

Flirt and Eat Your Fruit n Vegies

Hexaculturalist

7 Comments
margaret
love how you have played around and produced this quilt gets my vote over the origonal will be linking back to make notes in my ideas book for the future
elliek
What a great block Jane. Love it.
KMSC
I love your quilt! The design is so clever, using the fat eighth pieces. Thanks for the inspiration.
Fiona
lovely happy quilt… and I do love that you used all the fabric….
Hugz
Christine M
Your quilt is lovely, Jane.
MsMidge
Cute! I see stalks and leaves?!?!?!
Christine S
Thanks for sharing!