How to make a Dresden Angel block
The delightful duo – Mary and Barb from Me and My Sister Designs stock this fabulous Dresden ruler and new patterns in their e-store. Being a big fan of Dresdens and not having a 36 degree wedge, I simply had to get one.
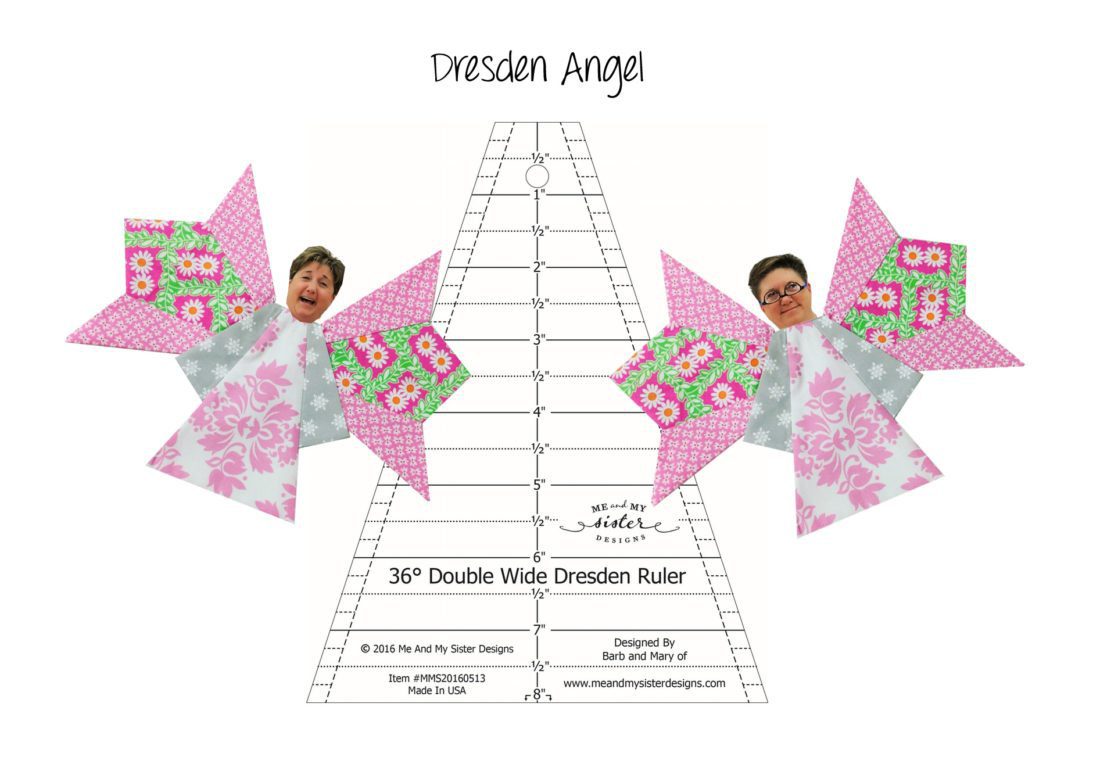
Christmas is fast approaching so I decided to an angel block. The wings, sleeves and dress all use the Double Wide Dresden Ruler.
Here is a very basic tutorial on how to make your own angel block.
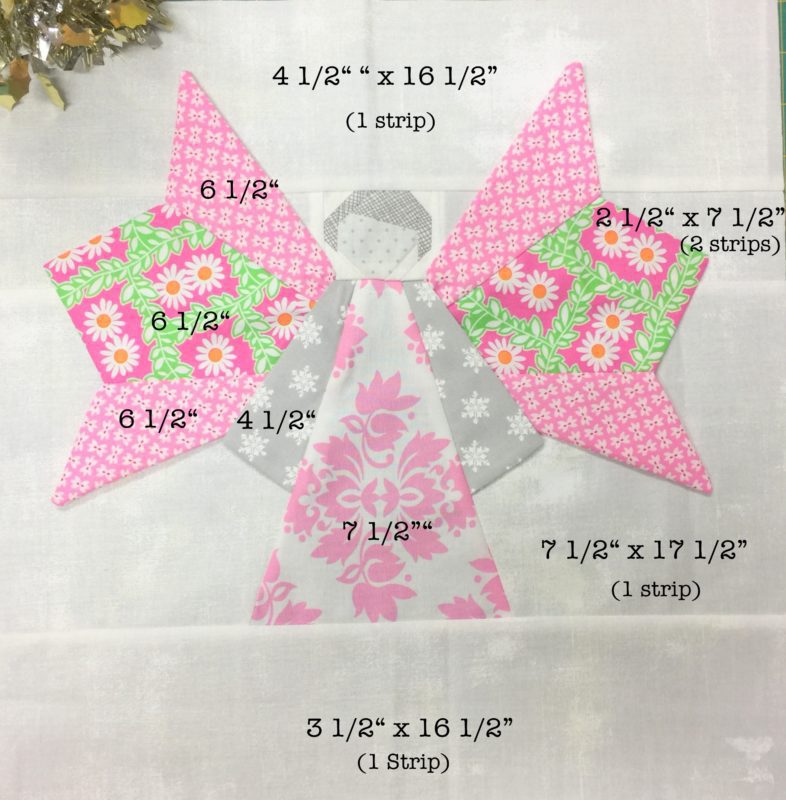
Block size: 16″ x 16″
Requirements
Background fabric
1 fat quarter, cut into:
- 1 – 4 1/2″ x 16 1/2″ strip (top)
- 1 – 3 1/2″ x 16 1/2″ strip (bottom)
- 2 – 2 1/2″ x 7 1/2″ strips
- 1 – 7 1/2″ x 17 1/2″ strip
- Scraps for paper piecing (head)
Wings
I used 2 fabrics but you could make the wings scrappy.
- 1 rectangle – 6 1/2″ x 8 1/2″ (centre wings)
- 1 strip – 6 1/2″x 18″ (outer wings)
Sleeves
- 1 rectangle – 4 1/2″ x 7 1/2″
Dress
- 1 square – 7 1/2″ x 7 1/2″
Head (Paper Pieced)
- Scraps for background, hair and face
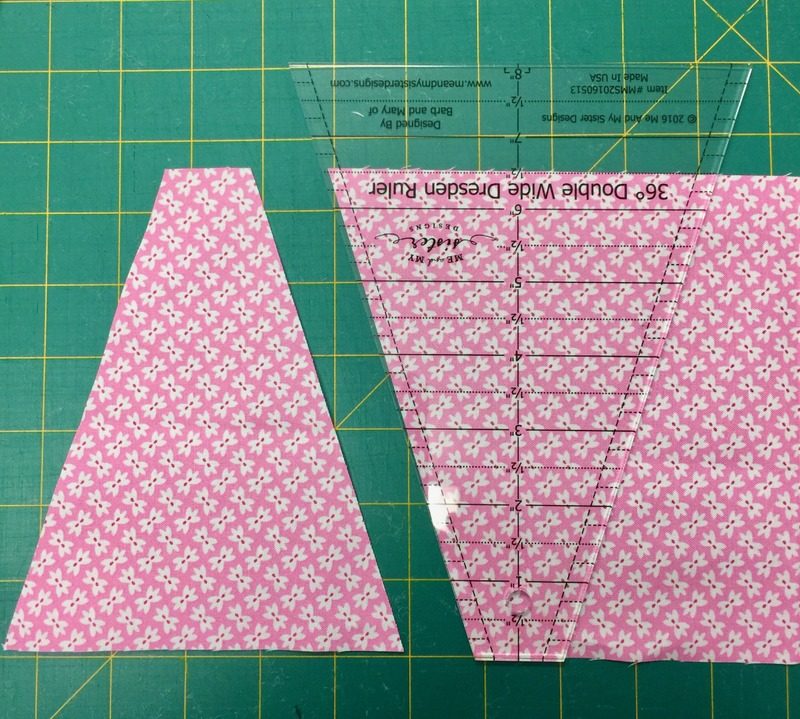
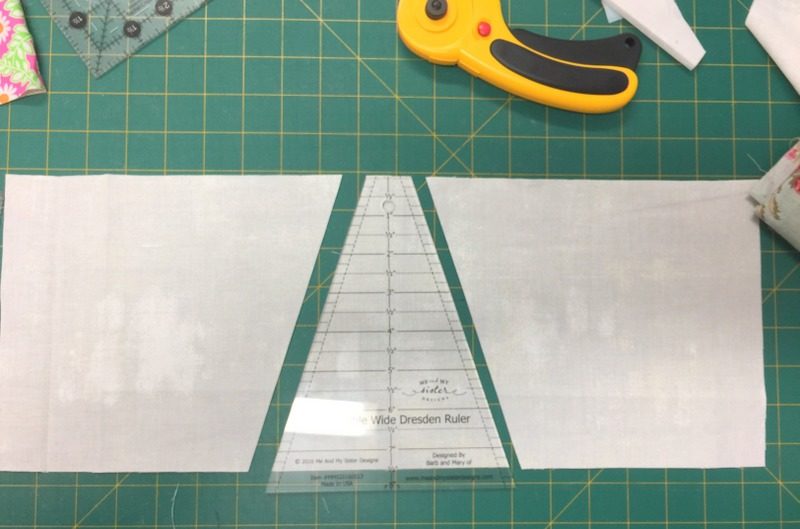
1 – 36 degree double wide Dresden ruler
Block Assembly
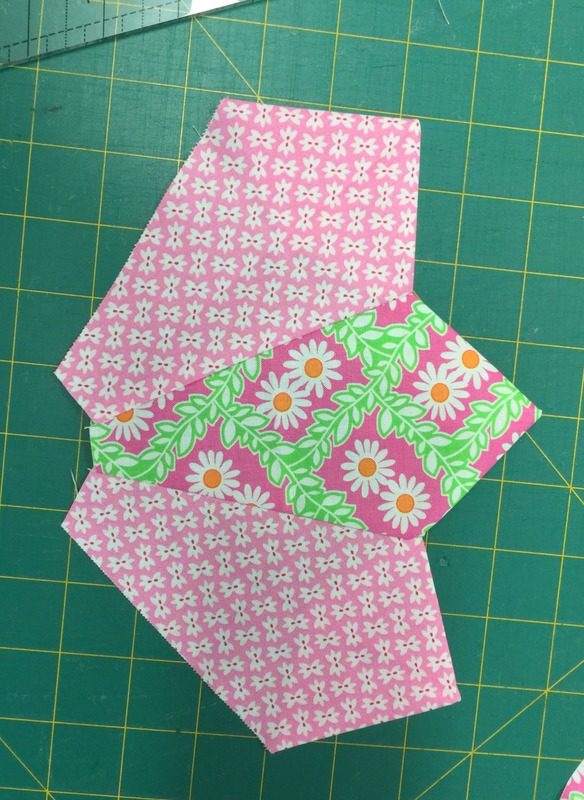
Using the 36 degree Double Wide Dresden Ruler, cut:
- one dress (7 1/2″)
- 6 wings (6 1/2″)
- 2 sleeves ( 4 1/2″).
To make wedges, place the tip of the ruler at the top of your strip and cut. Rotate ruler and cut again.
Make 6 – Dresden blades from the 6 1/2″ wedges.

Sew them together in 3’s. Press seams in one direction.
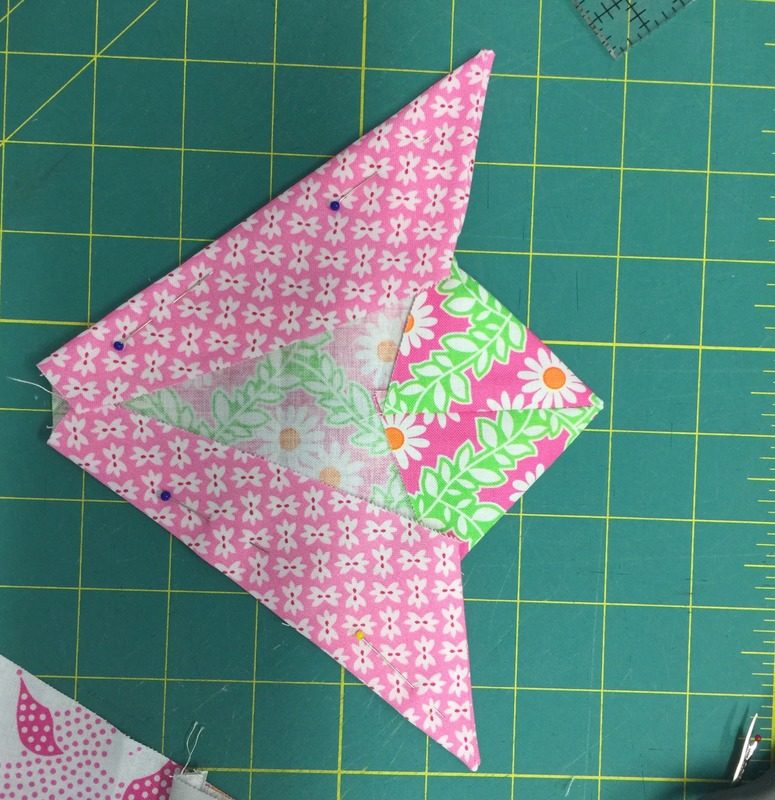
Fold in half (lengthwise) the 2 outer blades and pin to secure.

Fold the 4 1/2″ sleeve pieces in half with right sides together. Sew 1/4″ along the top. Clip at centre to remove bulk. Press flat.
Place sleeve at top end of dress. Align raw edges. Tack 1/8″ away from edge to secure.
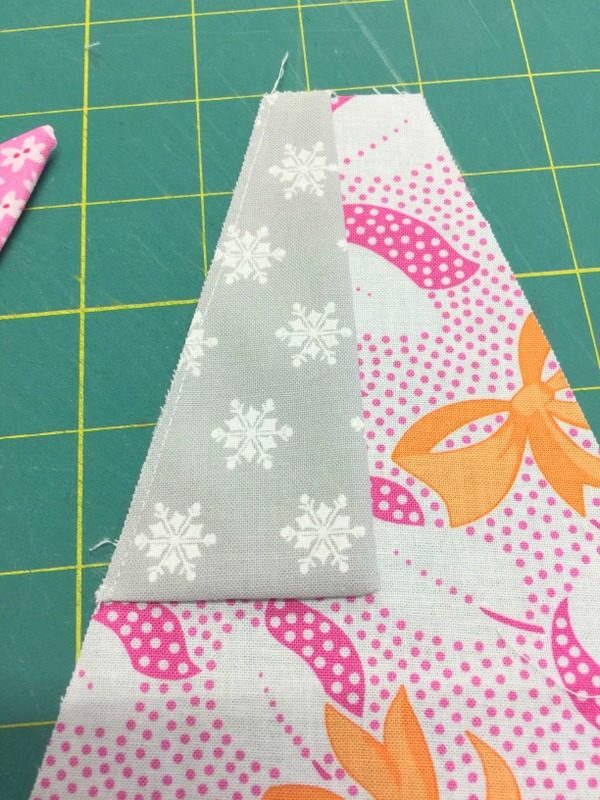
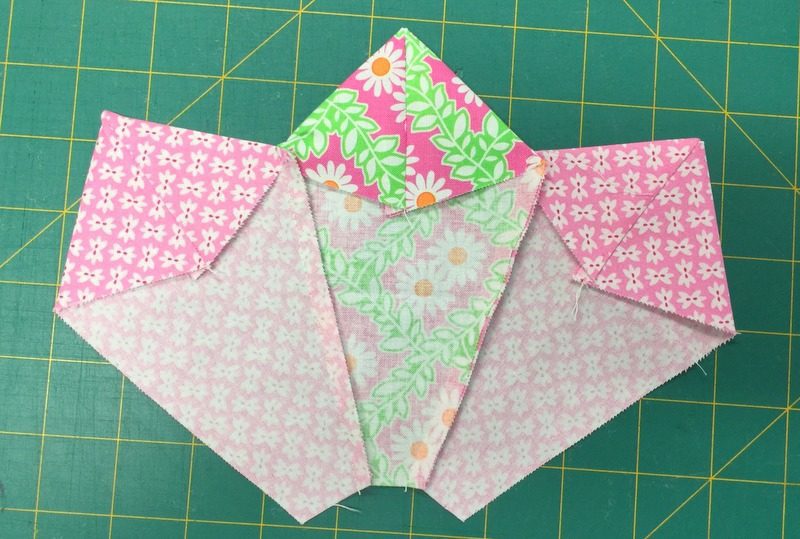
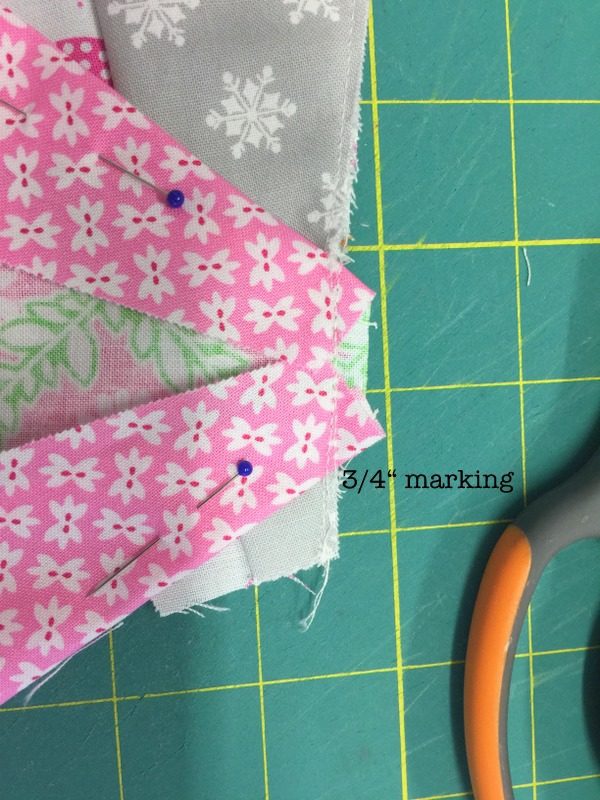
Make a mark 3/4″ from top of dress and layer the wings on top of the sleeve.
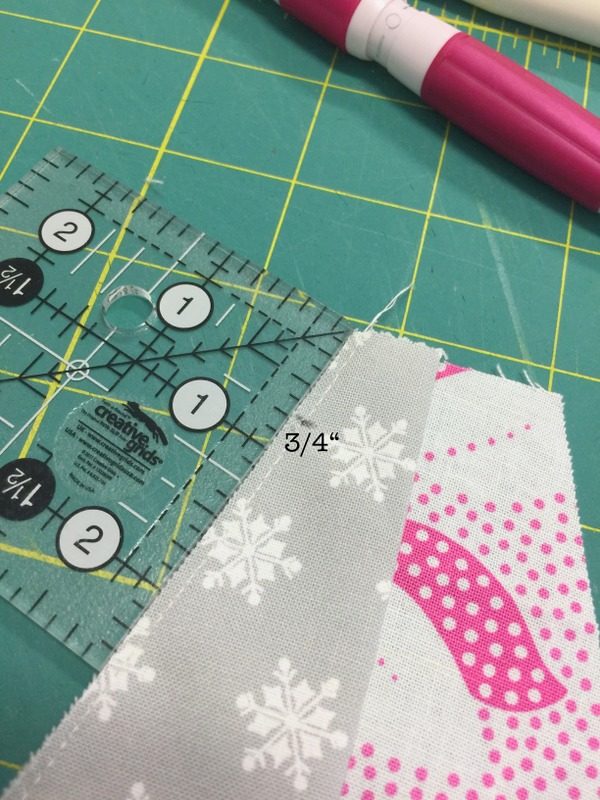
Place the wings, right sides together, on top of sleeve. The wings should be 1/4″ over the edge of the dress/sleeve. (Cut this excess off later). Align the top wing with the 3/4″ marking. Stitch 1/8″ from edge to secure in place.
Using the 7 1/2″ x 17 1/2″ background fabric strip, place the 36 degree Wide Dresden Ruler in the centre of the strip and cut both sides. Discard the centre wedge. The two outer pieces will be the left and right background pieces for the angel wings.
Layer the dress / sleeves / wings unit, right sides together with the left background piece. Note the background over laps at the start by 1/4″ and the dress overlaps by 1/4″ at the finish. This will ensure when you sew the 1/4″ seam and fold back the dress it will be perfectly aligned with the bacground.
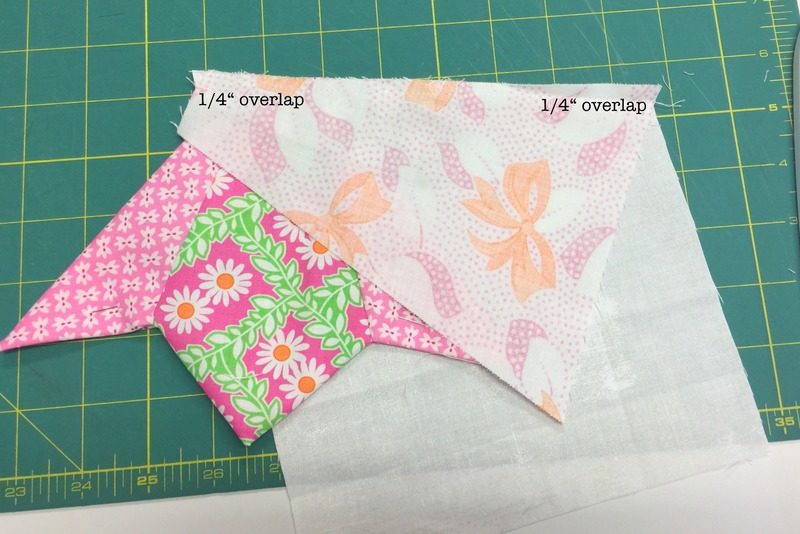
Sew a 1/4″ through all layers. Press towards background.
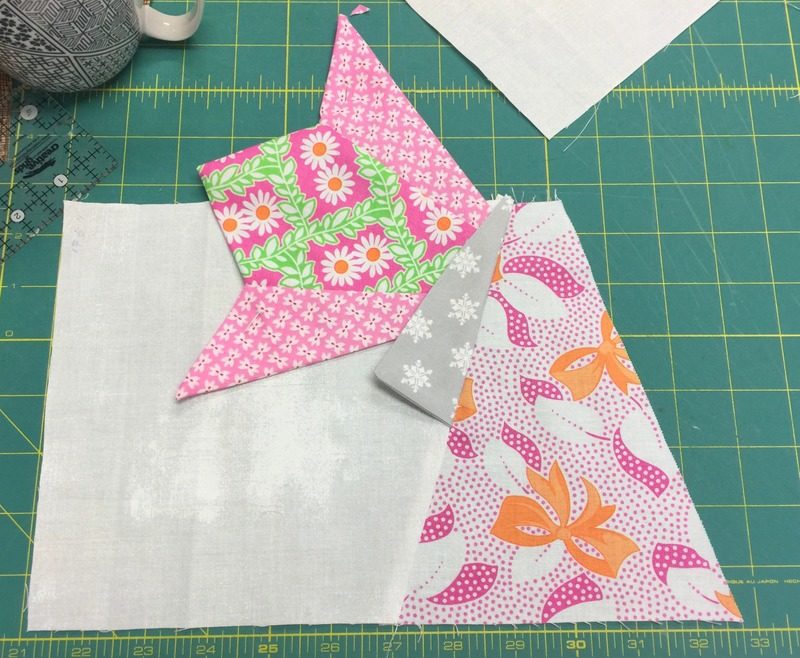
Repeat steps for adding sleeve, wings and background for the other side.
Make the paper pieced angel head. Download file here.

Sew the 2 – 2 1/2″ x 7 1/2″ background strips to both sides of the angel head. Press towards the background.
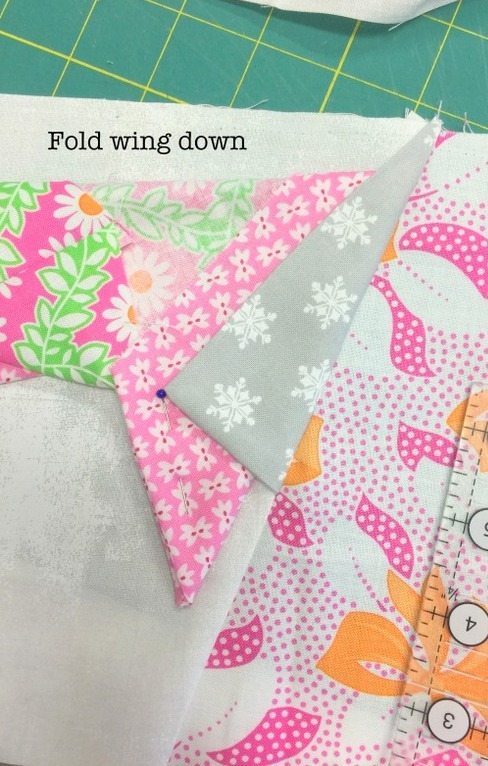
Fold down the wings and pin so they don’t get caught in the seam when sewing the head to the body.
Find the centre of the head and centre of the dress. Place angel body and head unit, right sides together. Pin centre. Sew 1/4″ seam. Press towards head.
Sew
- 1 – 4 1/2″ x 16 1/2″ strip to top
- 1 – 3 1/2″ x 16 1/2″ strip to bottom
Press towards background.
Applique the wings and sleeve edges to the block using a tiny hand applique stitch and matching thread.
Unfinished block measures: 16 1/2″ x 16 1/2″
Finished block measures: 16″ x 16″
Enjoy your little Dresden Angel.

[wc_divider style=”dotted” line=”single” margin_top=”” margin_bottom=””]
Ruler and patterns also available at Fat Quartershop