
The Desperate Housewife’s Quilt – Block 3 Evolution
 |
| The square to the hourglass to the pinwheel …….. |
Welcome to week 3 of the ‘The Desperate Housewife’s Quilt’. Todays block is all about pinwheels and hourglass piecing. Remember, this is not a quilt-a-long. Just follow the blog every week and pick and choose which blocks you would like to make. I will be injecting some uniqueness into traditional blocks, applique, three dimensional, crazy and thread-art blocks. If you make a block you can post it on the Flickr group for everyone to enjoy. Also, I have this nifty button under each post that allows you to save the post as a PDF.

- Accuracy in cutting
- Joining multiple seams
- Calculating size of squares to make finished pinwheel and hour glass block.

Select a light and dark fabric. For the 3.5″ pinwheel I cut 4″ squares ( remember you can always trim back ). The 1/2″ for me seams to be enough to allow a little trim when finished and not too much waste

Place the two squares right side together and sew 1/4″ around edge.
 |
| Left – 2.5″ pinwheel block using 3″ squares Right – 3.5″ block using 4″ squares |
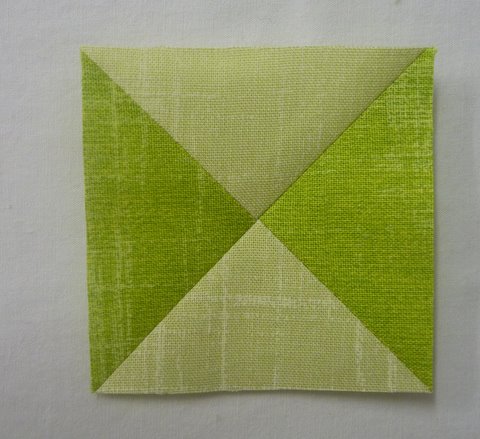
Using a squaring ruler, cut once diagonally.

and without moving apart the cur fabric, make another diagonal cut in the opposite direction.

Press open all the seams and you will have four HST’ ready to be arranged for sewing.

Remove the ‘rabbit ears’ ready for sewing. Arrange the HST’s so they alternate dark / light.

Sew the top HST’s together being careful to match the points and repeat for the bottom HST’s.


Press open the seams. Join the top and bottom sections together. Press open the seam and then trim back to 3.5″.


Hourglass block
Cut 2 x 3″ squares and lay them right sides together.

Draw a pencil line form corner to corner. Sew 1/4″ on either side of the line.

Cut on the pencil line and then make a another diagonal cut in the opposite direction.

This technique will yield 4 x HST. We only need two for this block. Remove the ‘rabbit ears’ and sew the two triangles together.

Trim back the hourglass block to 2.5″.
Now you should have 1 x 3.5″ pinwheel, 1 x 2.5′ hourglass, 1 x 1.5″ square and 1 x 2.5″ pinwheel.

Layout the finished blocks and brown pieces as per the diagram below
and then sew each row and join finished rows together.

You can have a lot of fun with this block. Try replacing some of the background pieces with different colours.

 |
| Original Block |
 |
| Pattern 1 – Rotation and colour replacement |
 |
| Pattern 2 – Rotation and colour replacement |
 |
| Pattern 3 – Rotation and more colour adaption. |
 |
| On point, no rotation
The following examples are all on-point settings with rotation of the blocks.
|
 |
| This one reminds me of Stalactites and Stalagmites in a cave |


Out guest blogger for next week will be Deanna
*** Please remember that these blocks and any blocks designed by guest bloggers should not be used for commercial purposes ( sold as a pattern, published etc) without the written consent of the owner ***


6 Comments
Deanna
The on-point settings are so startling! I really, really like the first (horizontal) one.
Anyway, I am busy working towards next week. And being nervous. And excited.
Karen Wilson
WOW, I really want to make this one!!
Not that I haven't wanted to make the others, just that I've got so much on my plate at the moment I wouldn't even consider it… but this one is just too awesome to put aside till later.
elliek
Never thought of doing pinwheels like that but I sure need to give it a go. Am liking all these blocks. Must work out how to save them.
Jessica
I love this one! The stalagmites in cave layout is fantastic!
Karen
This is a great block and I love the idea of turning it into a whole quilt. Thank you for the great ideas and the very clear instructions!
Melody
What a fabulous way to make a pinwheel. You are so clever.