
Nested Churn Dash Tips and Hints 1 and guest blogger Carrie Nelson
 |
| Carrie’s Quilt – Ooh La la! |
Carrie Nelson, who is the genius behind Miss Rosie’s Quilt Co and well known for her Schnibbles and Little Bites patterns and products, is my guest blogger today presenting her Nested Churn Dash quilt. As you will read from Carrie’s post, we shared a spot in the APQ QAL earlier this year. I was in constant awe of her quilt as I am for all her designs.
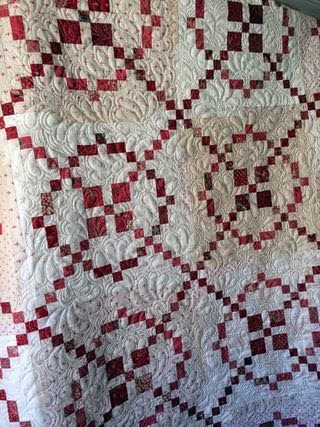 |
| Carrie’s low volume Burgoyne surrounded. |
Carrie has been posting pictures of her progress on Instagram using #nestedchurndash hashtag. Carrie has created the most wonderful post about her assembly process and some very helpful tips on adjusting the measurements of the ‘Rails’ to support the true size of each nest. She has added some brilliant sashing and border additions to the quilt.
Visit Carrie’s blog, La Vie En Rosie , to view the post and make sure you stop for a while and explore the rest of the magical world of Miss Rosie.
Tips and Hints #1 – Half Square Triangles – HST’s
There are many ways to make a HST. These are the most popular.
- Cut 2 triangles and sew them together.
- Use pre-printed foundation paper to make multiple units.
- The 2 square, 2 HST method.
- The 2 square , 8 HST method.
Method 1: Triangles
The formula for cutting 2 triangles from a square is:
Size of finished HST + 7/8″.
For example :
Finished size of HST = 4 1/2″ x 4 1/2″. Cut a square 5 3/8″ and cut once on the diagonal to yield 2 triangles.
This method requires accuracy, has no waste but you will be sewing along a bias edge.
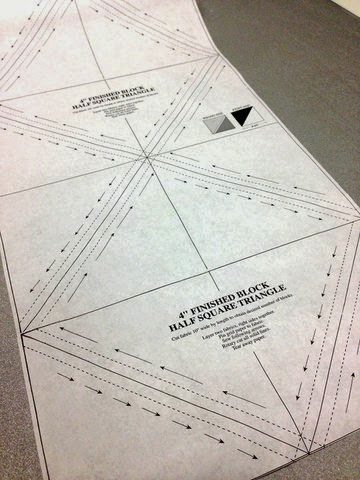
Pre-print foundation paper
My favourite paper is the Triangle on a Roll Paper. It has a very light consistency so it is easy to tear and comes on a range of sizes.
It is great to make a few HST’s at a time or large quantities.
The design of this technique supports little waste and negates handling bias edges.
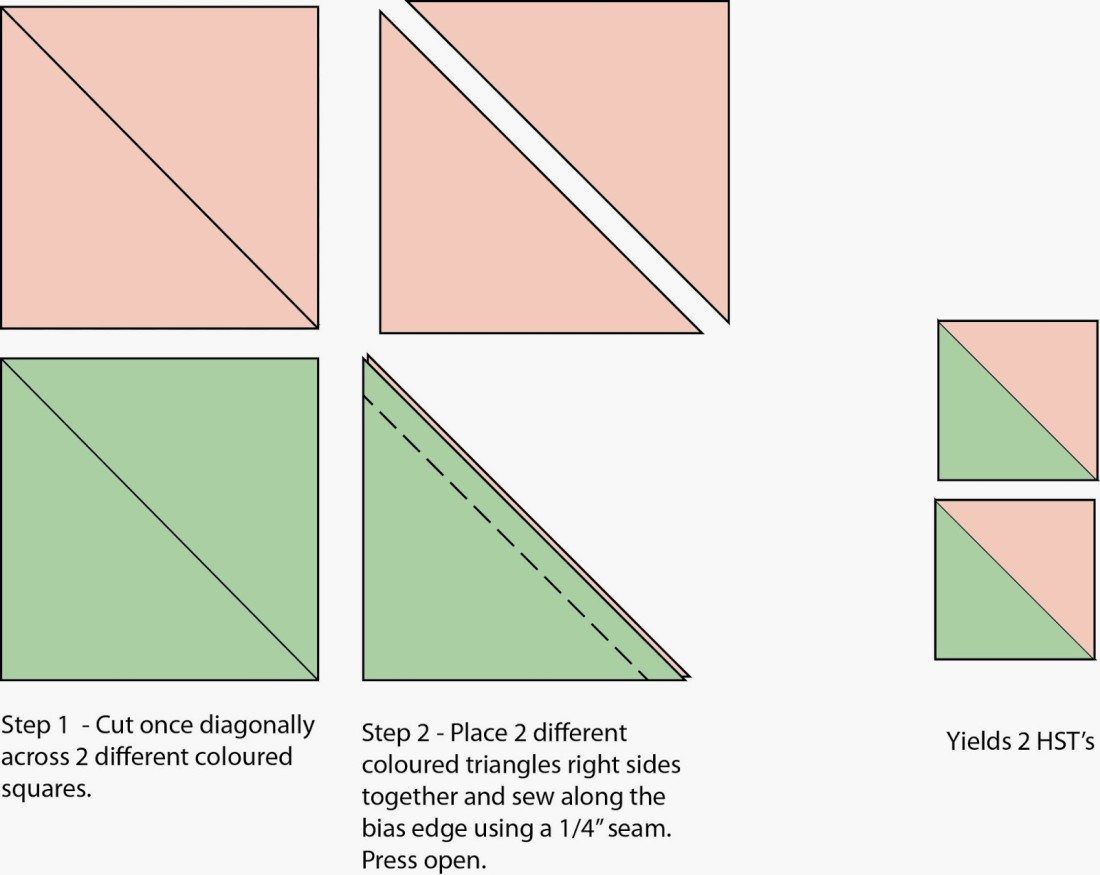
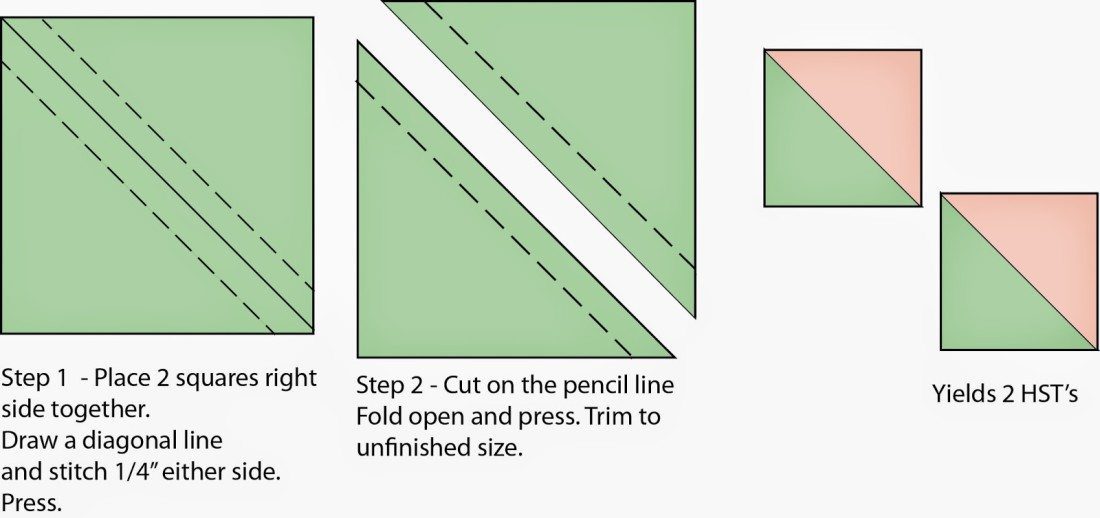
2 square, 2 HST method
This is the method I use the most when blocks involve HST’s. It yields 2 HST’s at a time.
Like the paper method, you eliminates handling bias edges. There is a minimum amount of waste and the trimming the HST’s to the desired size gives you a nice crisp, accurate block.
The formula for cutting the squares required for this method is:
Add 3/4″ – 1″ greater than the unfinished size of the HST.
For example:
Unfinished size of HST is 2 1/2″ x 2 1/2″. Cut 2 squares 3 1/2 x 3 1/2″.
N.B In the Nested Churn Dash pattern I have cut the squares 3/4″ large to minimise waste.
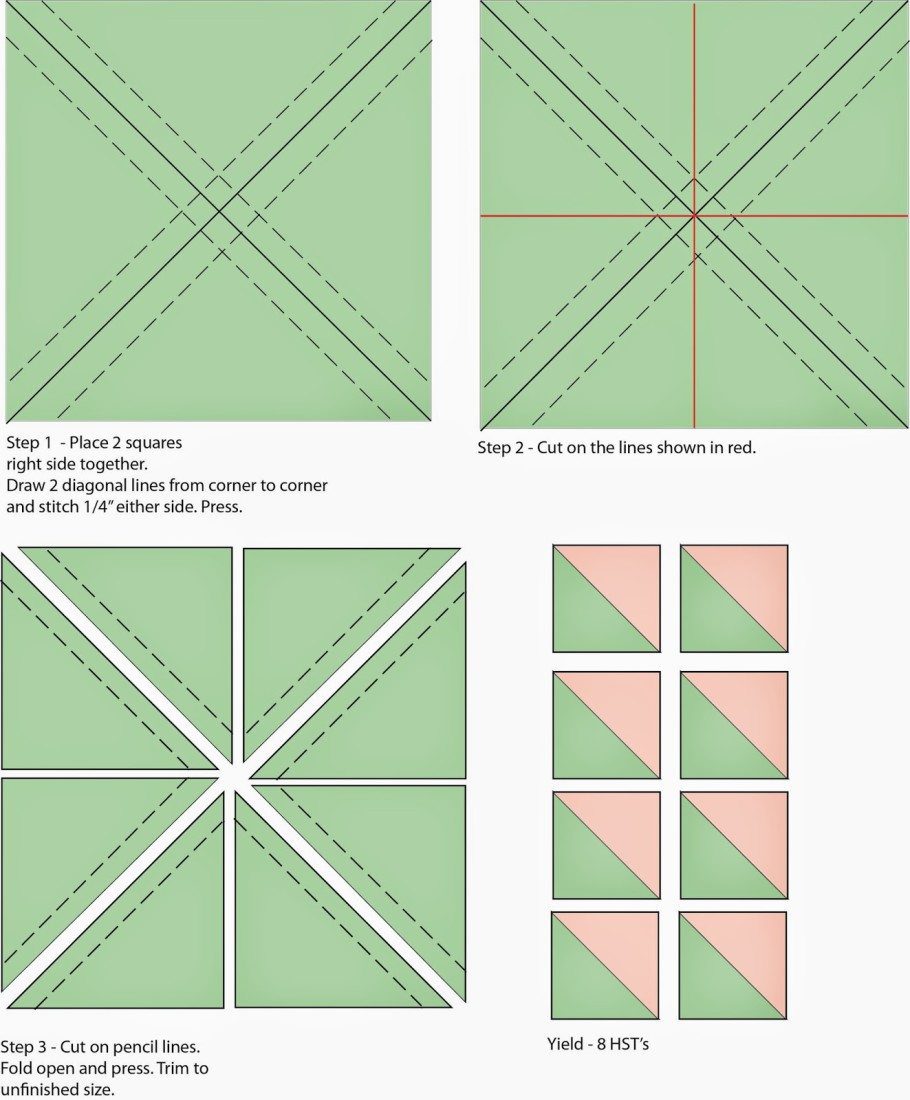
2 squares, 8 HST method
This method has the same benefits as the 2 square, 2 HST method but with the added bonus of yielding 8 HST units.
The formula for cutting the squares required for this method is:
Double the size of the unfinished HST and add 1″.
For example:
Unfinished size of HST is 2 1/2″ x 2 1/2″. Cut 2 squares 6″ x 6″ (2.5 + 2.5 + 1).
Hint: adding an extra 1/4″ to these measurements gives you a little more room to trim block.
Trimming an HST
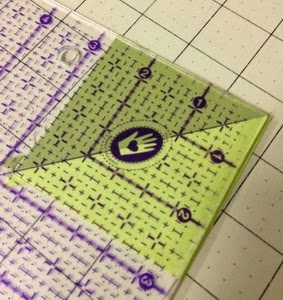
The most important thing to do when trimming HST’s is keep the 45 degree line on your ruler on the diagonal line of the untrimmed HST.
Trim top and side of the HST.
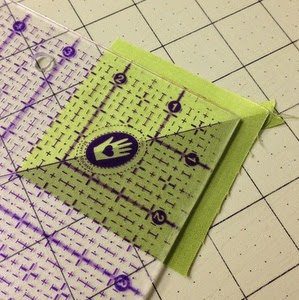
Turn the block and trim remaining top and side of the HST. this HST is being trimmed to 2 1/2″ x 2 1/2″ unfinished. I have aligned the 2 1/2″ markings on the ruler on the side an bottom of the block.
If you do not keep the 45 degree line of the ruler on the diagonal line of the untrimmed HST, you get an uneven corner and it will affect the meeting of intersecting points in block construction.
Pressing Seams
I like to press seams open. I don’t get shadowing and the seams lie nice and flat. If you like pressing seams to the side, always press towards the dark side Luke. Reducing the stitch length and selecting a 50wt thread that matches or blends well is helpful when pressing open seams.
Tomorrow we have Go Go Kim Niedzwiecki and her mini nested churn dash.
June 10th – Kim Niedzwiecki – http://www.gogokim.blogspot.com.au
followed by
June 11th – Pat Sloan – http://www.blog.patsloan.com
June 12th – Lissa Alexander – http://www.modalissa.blogspot.com
June 13th – FatQuarterShop – http://www.fatquartershop.blogspot.com.au
June 16th – Frances Newcombe – http://www.bellybuttonsboutique.blogspot.com
June 18th – Sherri McConnell – http://www.aquiltinglife.com
June 19th – Sara Lawson – http://www.sewsweetness.com
June 20th – Amy Smart – http://www.diaryofaquilter.com
June 21st – Katy Jones – http://www.imagingermonkey.blogspot.com
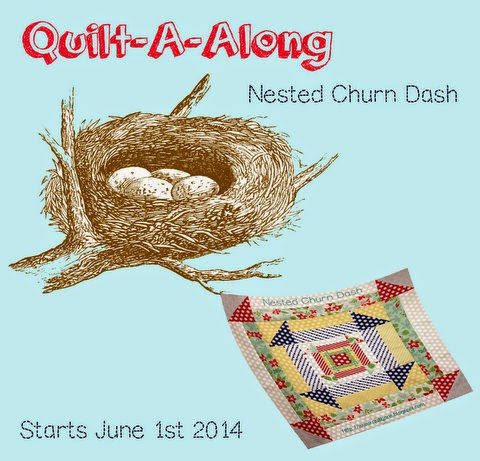
Upload your finished blocks or projects to the Flickr Group to win some beautiful Aurifil thread packs and other great prizes. Use #NestedChurnDash on IG, FB, Flickr and twitter. Winners will be announced 30th July 2014.




4 Comments
margaret
I have not tried the 8 half square method before but will have a go, have read about it before and with your instructions will be able to make some, .
Raewyn
Interesting post – I need to try the 8 HST method – such a good idea!
Nedra
Thanks for recommending Triangles On A Roll! I am the Sales Manager with TOAR, and feel it's the easiest and most accurate way to make Half Square Triangles. I am starting this Nested Churn Dash this morning and can hardly wait to get started!
Carrie
Thank you for the kind words – I'm blushing.
I love that you mentioned different methods for HTSs – "tools for the toolbox". Everybody has the method that works best for them but it's good to know how many other ways there are as sometimes your favorite method doesn't work for one reason or another. As with most things, the more we know, the better off we are. 🙂