
The many ways to make a hexy look sexy …. and Harry Potter
Before I talk about hexies I want to give a brief review of “Harry Potter and the Deathly Hallows”. Very dark and mature themes in this chapter. I would not recommend it for children under 13. It has a ‘M’ rating in Australia, indicating parental guidance for children under 15. Regardless, my 12 year old and I loved it. It is more in keeping with the book than number six. The children are now adolescents and past the prepubescent stage and Harry even had a bit of stumble on his face after going bush for a couple of days. Hermione and Ron have an unrequited, smoldering love thing going on while poor Harry has the weight of the universe on his shoulders. Voldemort is as evil as ever and I wish he would grow a nose. I recommend Deathly Hallows to all Potter fans and am counting the days until Part II comes out in July 2011.
|
| “Take that LEGO Voldemort. You big block head!” |
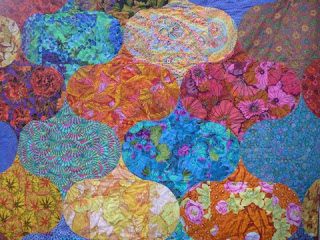
Being involved in two hexie swaps, I have been enlightened to some interesting ways of attaching the fabric to the stabiliser (Paper, card, patti, freezer paper or fusible base).
The tacking method – Whether you sew through all layers or just the fabric is up to you. Both give a crisp edge finish and the papers are easy to remove once the hexies are joined. The hexies can be stored for a long period of time ( I had hexies still with the magazine papers from the early 70’s).
Bee in my Bonnet has made some great tutorials on making and basting hexies.
Making Hexies Part 1
Making Hexies Part II
 |
| Left – Tacked through fabric only / Right – Tacked through paper and fabric. |
The gluing method – This is my favourite method at the moment because of the speed of preparation of the hexie flowers. It is important to use the correct fabric glue and card stock of 150 – 190gms to make removal easy. As the glue is water soluble and affected by heat, care must be taken when pressing and storing for long periods of time.
 |
| Glue Method using Sewline Glue Pen |
Wash-a-way Fusible method. This is the same principle that is used in applique. The hexie template is traced with a pencil onto the floriani wash-a-way stabiliser. The hexie shapes are cut and ironed onto 2 1/2″ squares of fabric, trimmed leaving a 1/4″ seam allowance and then tacked to form the finished hexie.
Here is a great tutorial from Marina at www.maisieandtheboys.blogspot.com
@font-face {
font-family: “Calibri”;
}p.MsoNormal, li.MsoNormal, div.MsoNormal { margin: 0cm 0cm 10pt; line-height: 115%; font-size: 11pt; font-family: “Times New Roman”; }div.Section1 { page: Section1; }
- Using hexagonal graph paper created at incompetech I trace the hexagons onto Floriani stitch and wash Fusible stabiliser.
- Once you have traced a few rows you will need to cut out the hexagons as accurately as you can. Cut out your hexagon fabric. I prepare them into 2 ½ inch squares (or 2 5/8 inch squares to make it a little easier to stitch down) . Iron the hexies onto the wrong side of the fabric
- Trim the hexie to allow an amount of turnover.
- Next step is to turn over the excess material and stitch down. I usually fold over the fabric and finger press it all around the hexie before stitching the fabric down.
- Assemble your hexie flower.
(there are further instructions on the use of this stabiliser on the packet)

I would also like to try using the fusible web as you would in hand turned applique and ironing or gluing the seam back onto the fusible web. The fusible web would washed away when the project is completed.
Freezer paper is also an option. Iron the shiny side to the fabric, cut around the hexie shape leaving a 1/4″ seam allowance and then glue or tack as usual.
When using a medium other than paper to stabilise your hexies, always follow the manufacturers instructions.


6 Comments
marina
I am a huge HP fan too and saw the movie on Friday night and was of two minds. If you didn't know the books I think a lot of 'in' things would be missed. I also wish the support characters were given more depth as some of them are my favourites especially if they were splitting the book in two. Having said that it did bring the book to life as I had imagined and I will probably see it again. I love Fred and George!
Possum Blossom Patchwork
Thanks for the useful info QuiltJane. A few months ago I was looking for this sort of info and couldn't find it anywhere.
I can't wait to try out the glue pen I just received from you. On the other hand, maybe I should keep doing the tacking method because some of my hexi-flower projects take years to complete (because I keep starting new ones)!
Thanks,
Joanne
Brigitte
Thank you for the tutorial. I'm going to try the gluestick method. The cardstock weight I'm not sure of. Would it be like the paper used for manila folders, dividing hanging folders?
http://www.quiltsampler.blogspot.com
Possum Blossom Patchwork
Hi Brigitte, The lightweight cardstock for my card hexies is probably similar to what's used for greeting cards. Photocopy paper is 80gsm, manila folders are around 250gsm I think, and the card is 190gsm.
I haven't tried my glue pen yet, but I'm sure any sort of card works fine with it. I remember at one stage cutting up all sorts of card to do some "scientific testing", and I liked the 190gsm the best. Not too thick, not too thin.
Joanne
Jessica
I am a huge fan of glue pens and sticks but recently read this post http://onceuponaquilt.blogspot.com/2010/11/some-info-from-international-quilt.html. Christine says that studies show that glue, even waterbased, will damage fabric over time.
A lot of hexie quilts become heirlooms because of the time and effort involved, is it worth the few minutes saved if the quilt could deteriorate in the future?
Sharyn Mallow Woerz
You've missed a third method, using Linda Franz's Inklingo method. Million times easier than basting or gluing because you don't need the inserts!
All the best, Sharyn