DIY Block Design
Alyce from Blossom Heart Quilts is a blogger, quilter and designer extraordinaire who has recently published a digital book called ‘DYI Block Design‘. This publication is full of techniques for making the most common design elements for blocks as well as helpful hints and tips on block structure. Alyce has asked each one of us to talk about an aspect of block / quilt design during the month of October.
Your challenge is to design and make your very own quilt blocks. At the end of the month, there will be a linky opened for you to link up your completed quilt blocks (or projects!) and be in the draw for some great prizes.
There is also a weekly challenge hosted (Monday- Sunday) on Instagram using #mydiyblockdesign. Prizes will be awarded each week.
- Week 1 – share their inspiration
- Week 2 – share their sketches and plans
- Week 3 – share their making progress
- Week 4 – share their finished blocks/projects
This challenge is open to every one from the beginner to the experienced designer.
Schedule:
October 1 – Let the games begin!
October 2
Heidi @ Fabric Mutt
Christa @ ChristaQuilts
Angie @ Gnome Angel
Week 1: Inspiration
October 7
Ros @ Sew Delicious
Leanne @ Sewn By Leanne
Amy @ And Sew We Craft
October 9
Jennie @ Clover & Violet
Jane @ QuiltJane
Melissa @ My Fabric Relish
Week 2: Sketches
October 14
Jen @ Faith And Fabric
Beth @ Cooking Up Quilts
October 16
Sandi @ Crafty Planner
Anne @ Play Crafts
Jess @ Elven Garden Quilts
Week 3: Making
October 21
Joy @ Quilty Joy Joy
Linden @ Vine Lines Quilting
Cassie @ Cassandra Madge
October 23
Keera @ Live Love Sew
Janice @ Better Off Thread
Michelle @ Factotum Of Arts
Week 4: Finishes
October 28
Kelly @ A Place Of My Own
Abby @ Color Bar Quilts
October 30 – Linky opens
Mineral Block – Design tips for connecting blocks
“No man is an island, entire of itself.”
― John Donne, No man is an island
John Donne eloquently expressed the truth that no one can exist alone and that every action that is made affects others. The same goes with a block that will be used in a quilt. It may look fabulous pinned to your design wall all on its lonesome but when you want to place it into a quilt suddenly it becomes an important piece in a very complex puzzle.
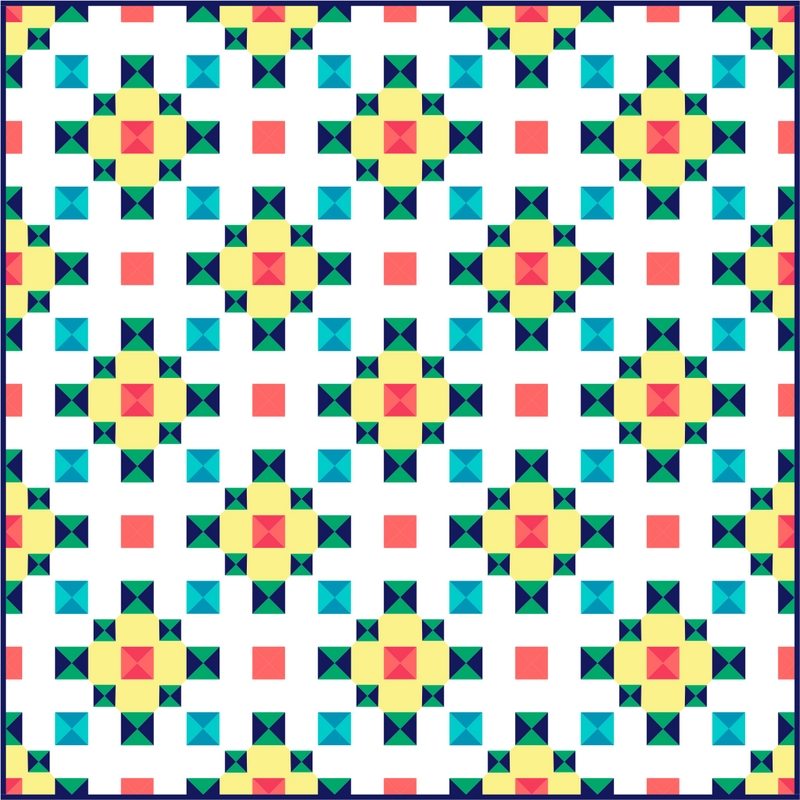
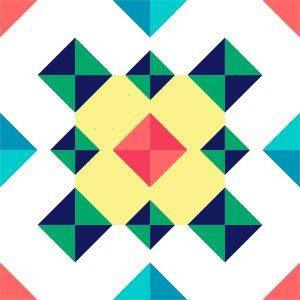
The example today is a single block made into 2 different quilt settings – horizontal and on-point. The Mineral block was done as part of Blossom Heart Quilt’s Bee Hive blog hop.
Firstly, when I design I ask myself this one question, “What is the aim in designing this quilt?” For some quilts it may be for a gift, a whim, to reduce my massive stash or to make an aesthetic and functional pattern to sell. Once a end point is established I break down the requirements:
- Does this quilt use a pre-cuts only or can I use scraps?
- What audience to I want to design a pattern for – beginner, intermediate or advanced. Do I want the audience to explore a certain technique?
- Is it to showcase the fabric? Large blocks? Use one designer over scrappy look?
- What size will the finished quilt be? Do I make smaller blocks or larger blocks? Is it a mini? Do I add sashing and borders? Do I leave negative space?
Knowing the answers to these few questions gives me a starting point so I can go into EQ7, draw on graph paper or use Adobe Illustrator to create a block design. I knew the Mineral block was for a bee block so it had to be easy and interesting and allow a variety of colours in the design.
Mineral is a 12″ x 12″ finished block. It is divided into a grid 4 x 4 with each unit measuring 3 1/2″ x 3 1/2″ unfinished. The diamond effect was created by adding 2 different sized corner triangles. The centre design was easy. It looks good square or on point. It can be coloured to make the block look different. The outside units were determined by the need to connect to adjoining blocks. The corner triangles were placed evenly along the sides with the same measurement where seams would intersect.
When you draw a block, make a few blocks and cut them out or play with them in EQ7 or Illustrator. See how the edge pieces line up or make interesting patterns with adjoining blocks. Adjust the pieces around the edge until they form the desired pattern.
Try them in different settings and decided whether the block creates its own border or a border is required to frame the quilt.


What happens when I change the colours in my quilt block? Do the intersecting blocks still form a pleasing pattern? Does it overwhelm the block or enhance it design?
After playing with your block and settings think how you would sew the block? Is it easy? Can you chain piece it? Do you want y-seams, partial Seams? You will find that your initial block design may evolve into something quite different from your original concept. This is the beauty of creativity. It’s endless and full of undiscovered potential.


4 Comments
Susie
Amazing variations.
quiltjane
Thank you. Once you start playing it is amazing how many different designs emerge.
Alyce {Blossom Heart Quilts}
Wow, such great variations! Thanks for sharing x
quiltjane
Thank you Alyce for organising the tour x