
Home Sweet Home Block – Under the Moreton Bay Fig
Kim Lapacek at Kims Crafty Apple blog is hosting a quilt along with the theme – Home Sweet Home. I was very honoured to be invited to design a block for the QAL.
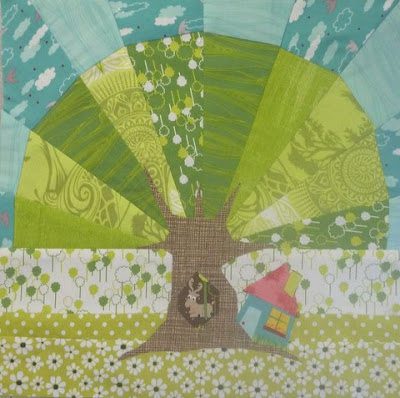
Block 7 – Under the Moreton Bay Fig
The requirement for the block was that it had to have a tree or a house or both. I chose both. Using the simple technique of foundation piecing (paper piecing ) and raw edge appliqué I created this block.
Materials
Hint – if you do not have the correct sized fabric, join strips of similar colours to make your own fabric.
Tree and Sky
Assorted pieces of Green fabric, minimum dimensions 4 1/2″ x 7 1/2″
Assorted pieces of Blue fabric, minimum dimensions 4 1/2″ x 10″
Grass
Green fabrics:
1 – 2 1/2″ x 12 1/2″
1 – 1 1/4″ x 12 1/2″
1 – 2 1/4″ x 12 1/2″
Leaves
10″ square piece of orange fabric
Tree trunk
7 1/2″ square of brown fabric
Embellishments
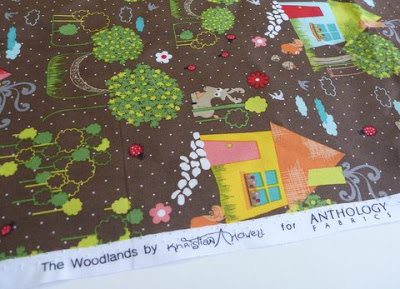
A piece of fabric with characters and objects that can be cut out and placed within the block. I chose the house, deer and acorn from the Woodlands collection by Khristian A Howell.
Assembly
Step 1 – Print out the foundation template – Page 1, Page 2, Page 3, Page 4. Remember not to ‘Fit to page’ or scale when printing.
Step 2 – Cut out the individual foundation pieces. Use the measurements recommended on the foundations template to cut fabric pieces.
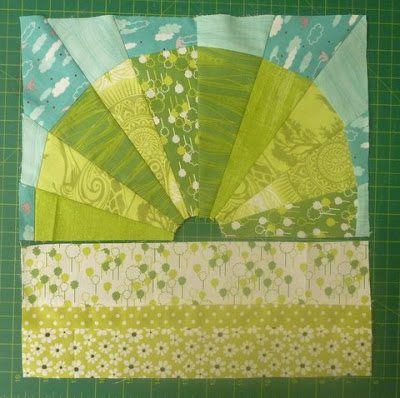
Step 3 – Foundation piece the top half of the block and remove the papers. The block will measure 8″ x 12 1/2″
Hint: There are many tutorials in cyberland teaching the beginner how to Foundation Piece (or Paper Piece). Patchwork planet is a great starting point.
Step 4 – sew together lengthways the three green grass strips. The block will measure 5″ x 12 1/2″
Step 5 – Join the two halves together.
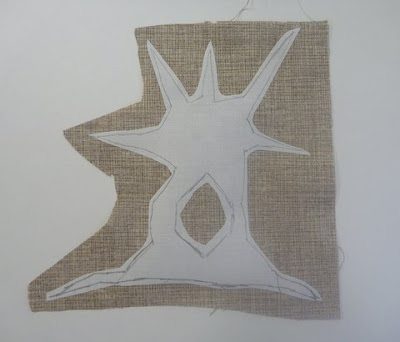
Step 6 – Trace the tree trunk template found here onto the back of fusible webbing. Cut out around trace line leaving 1/8″ allowance
Step 7 – Press fusible webbing to back of fabric as per manufacturers instructions
Step 8 – Cut out tree on trace line.
Step 9 – Fuse and cut out other objects to place around the tree and in the hollow of the tree.
Step 10 – Remove paper from backing of fusible web and layer the pieces to be appliquéd on the block. When you are happy with the placement, fuse shapes to block.
Hint – use appliqué glue to secure the tiny pointed edges of the tree trunk.
Step 10 – Trace 12 leaves onto fusible webbing. Cut out leaving 1/8″ around trace line.
Step 11 – Fuse leaves to back of orange fabric and cut out on trace line. Peel off backing paper.
Step 12 – Position leaves on tree and fuse according to manufactures directions.
Step 13 – Using matching threads and a smaller stitch, sew 1/8″ inside appliqué shape to secure the piece.
Hint – You can also use thread to add veins to the leaves or texture to the tree trunk. Try embroidery floss or perle cottons to add texture.
FInished block size 12 1/2″ x 12 1/2″
 |
| Grab the button and join in the fun. |




11 Comments
Melody
I absolutely LOVE this block.
Susan
I love the block, and that tree trunk is fabulous! I predict it will show up sometime in a crazy quilting block of mine. What a cute idea. Going to look at the rest of the blocks now.
ritainalaska
really great tree block! love it, and have stuck it im my tree folder to be admired and maybe make it for a tree quilt when i get around to it.
Fiona Gregory
Aw what a sweet block with a distinctive Queensland icon. Your tutorial makes it seem achievable.
Mermaid Sweets
Amazing, love this.
Maria
What a fabulous block. I live in a small town in Western Australia and our main street is lined with Moreton Bays, same a 100 years old. The street is called "Moreton Terrece".Sadly the White Cuckatoos love the trees too. They roost in there and just distroy them.
Jessica
Awesome block Jane!
quilterbell
This block is adorable, well done.
marina
what a gorgeous block! I love the way the canopy spreads out and the little house is very sweet.
Sis-O
I love this! thank you.
Mishka
Love your block Jane.